Toyota Corolla (E210): Rear seats
The seatbacks of the rear seats can be folded down.
Folding down the rear seatbacks
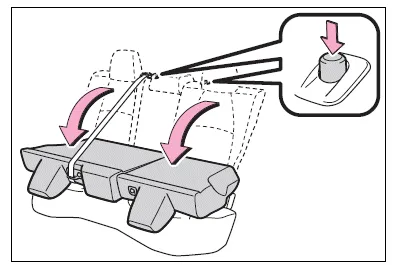
1. Move the front seats forward.
2. Stow the rear armrest. (if equipped).
3. Fold the seatback down while pushing the seatback lock release button.
Each seatback may be folded separately.

WARNING
Observe the following precautions.
Failure to do so may result in death or serious injury.
■When folding the rear seatbacks down
- Do not fold the seatbacks down while driving.
- Stop the vehicle on level ground, set the parking brake and shift the shift lever to P.
- Do not allow anyone to sit on a folded seatback or in the trunk while driving.
- Do not allow children to enter the trunk.
- Be careful not to get your hand caught when folding the rear seatbacks.
- Adjust the position of the front seats before folding down the rear seatbacks so that the front seats do not interfere with the rear seatbacks when folding down the rear seatbacks.
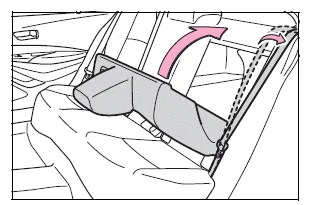
■After returning the rear seatback to the upright position
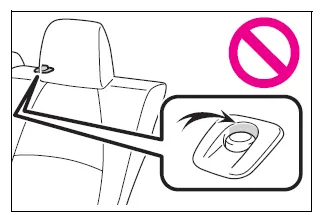
- Make sure that the seatback is securely locked in position by lightly pushing it back and forth.
If the seatback is not securely locked, the red marking will be visible on the seatback lock release button. Make sure that the red marking is not visible.

- Check that the seat belts are not twisted or caught in the seatback.
If the seat belt gets caught between the seatback's securing hook and latch, it may damage the seat belt.

NOTICE
■When the right seatback is folded down
Make sure the luggage loaded in the enlarged trunk will not damage the webbing of the rear center seat belt.
Other materials:
Engine hood/door
Preparation
Sst
Recomended tools
Equipment
...
Inspection procedure
1 Check side squib(rh) circuit(airbag sensor assy center – front
seat airbag assy rh)
Disconnect the negative (–) terminal cable from the battery,
and wait at least for 90 seconds.
disconnect the connectors between the airbag sensor
assy center and the front seat airbag assy ...
Wheels
If a wheel is bent, cracked or
heavily corroded, it should
be replaced. Otherwise, the
tire may separate from the
wheel or cause a loss of
handling control.
Wheel selection
When replacing wheels, care
should be taken to ensure that
they are equivalent to those
removed in load capacity, diameter,
rim ...


