Toyota Corolla (E210) 2019-2026 Owners Manual / Maintenance and care / Engine compartment / Checking and adding the
brake fluid
Toyota Corolla (E210): Checking and adding the brake fluid
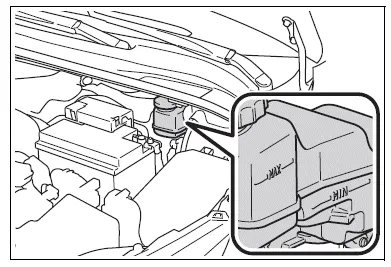
■ Checking fluid level
The brake fluid level should be between the "MAX" and "MIN" lines on the tank.
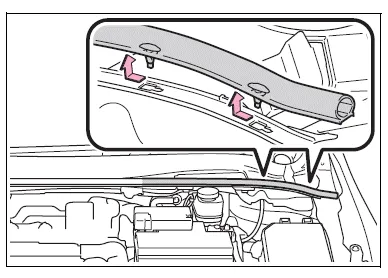
■ Adding fluid
1. Slide and lift up the rubber strip to partly remove it as shown.
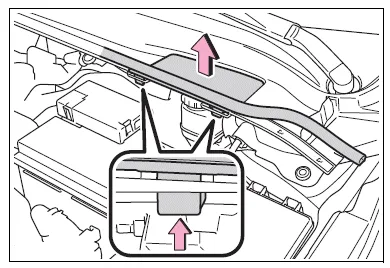
2. Disconnect the claws and remove the service cover.
3. Remove the reservoir cap.
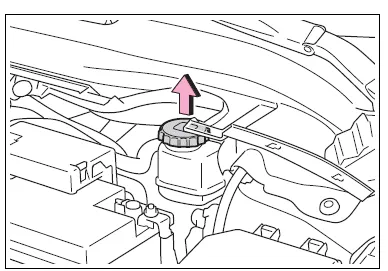
4. Add brake fluid slowly while checking the fluid level.
Make sure to check the fluid type and prepare the necessary item.
- Fluid type
FMVSS No.116 DOT 3 or SAE J1703 brake fluid
FMVSS No.116 DOT 4 or SAE J1704 brake fluid
- Item
Clean funnel
■Brake fluid can absorb moisture from the air
Excess moisture in the brake fluid can cause a dangerous loss of braking efficiency. Use only newly opened brake fluid.
WARNING
■When filling the reservoir
Take care as brake fluid can harm your hands and eyes and damage painted surfaces.
If fluid gets on your hands or in your eyes, flush the affected area with clean water immediately.
If you still experience discomfort, see a doctor.
NOTICE
■If the fluid level is low or high
It is normal for the brake fluid level to go down slightly as the brake pads wear out or when the fluid level in the accumulator is high.
If the reservoir needs frequent refilling, there may be a serious problem.


Other materials:
Handling of hose clamps
Before removing the hose, check the depth of the inserting
portion and the clamp position in order to restore it
surely.
change a deformed or dented clamp for a new one.
in case of reusing the hose, install the clamp on the hose
where it has a clamp track.
for a ...
Tire inflation pressure
Checking the specified
tire inflation pressure
The recommended cold tire
inflation pressure and tire size
are displayed on the tire and
loading information label.
Inspection and adjustment
procedure
Tire valve
Tire pressure gauge
1. Remove the tire valve cap.
2. Press the tip of the tire pres ...
Light bulbs
You may replace the following
bulbs yourself. The difficulty
level of replacement
varies depending on the
bulb. If necessary bulb
replacement seems difficult
to perform, contact your
Toyota dealer.
For more information about
replacing other light bulbs,
contact your Toyota dealer.
Preparing for lig ...